Browsing Category

WordPress Plugins

WordPress Plugins, WordPress Tips

How can users set avatar in WordPress

February 26, 2018

By default, WP does not allow directly uploading avatar image. So how can users use an image as their avatar?

There are two basic ways so users can set avatar themselves: Use Gravatar and Use a plugin.

  1. Use Gravatar

Gravatar is a service for providing globally unique avatars which be integrated into WordPress. In Dashboard > User area, you can see WordPress suggest you use Gravatar to change avatar.

To change your profile picture, go to https://en.gravatar.com/, sign in by WordPress account, then add your email and the image. The gravatar will be recognized where you use this email.

Moreover, Gravatar lets you add multiple emails.

  1. Use a plugin

Some membership plugins already have integrated uploading user avatar such as Indeed Ultimate Membership Pro, BuddyPress… So you do not need to find other plugins, maybe.

If you don’t like using Gravatar, no need to worry, there are a lot of plugins out there that can help you in this case. One of them is WP User Avatar plugin with interesting features such as:

  • Use image from Media Library as an avatar. This also mean uploading avatar just like uploading an image to Media Library by WordPress default.
  • Choose the avatar for the users who do not have a WP User Avatar image. You can choose showing user’s Gravatar or a default Avatar.
  • Support shortcodes to display or upload new avatar for users.
  • Allow Contributor and Subscriber upload their own avatar with the limitation of upload file size and image dimensions.

Besides, If you need further advanced features, you can consider to upgrade to WP User Avatar Pro version.

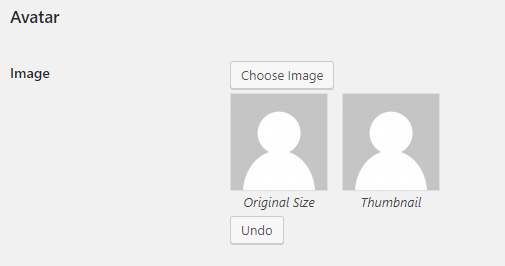
After installing WP User Avatar, you can see a section in User editor lets you change avatar.

If user profile page is styled by Theme My Login, that section looks from front end like this:

WordPress Plugins, WordPress Tutorials

How to get Facebook Live Chat on WordPress website

February 6, 2018

Currently, there are many plugins support adding Facebook messenger feature into your WordPress website. However most of these plugins only allow us to send our first message to Facebook page and you are unable to live chat on your website.

Although, recently Facebook is developing on a messenger platform that provides a customer chat plugin base on Javascript and it can be easily embed on any website platform, includes WordPress.

And WP-Chatbot is a WordPress plugin which can help you to integrate Facebook Live Chat feature with your WordPress website easily. It’s simple but useful, the plugin will give you many options to setup your Facebook Live Chat.

Please follow these steps to install and get Facebook Live Chat ready on WordPress site.

Install plugin

Download or install WP Chatbot for facebook Messenger plugin at https://wordpress.org/plugins/wp-chatbot/

Config WP-Chatbot Settings

On WP-Chatbot Settings page, Facebook App ID and Facebook Page ID is required to enable live chat feature.

  • Facebook App ID : Please follow the instructions in this document to create Facebook App and get Facebook App ID : https://holithemes.com/wp-chatbot/facebook-app-id/
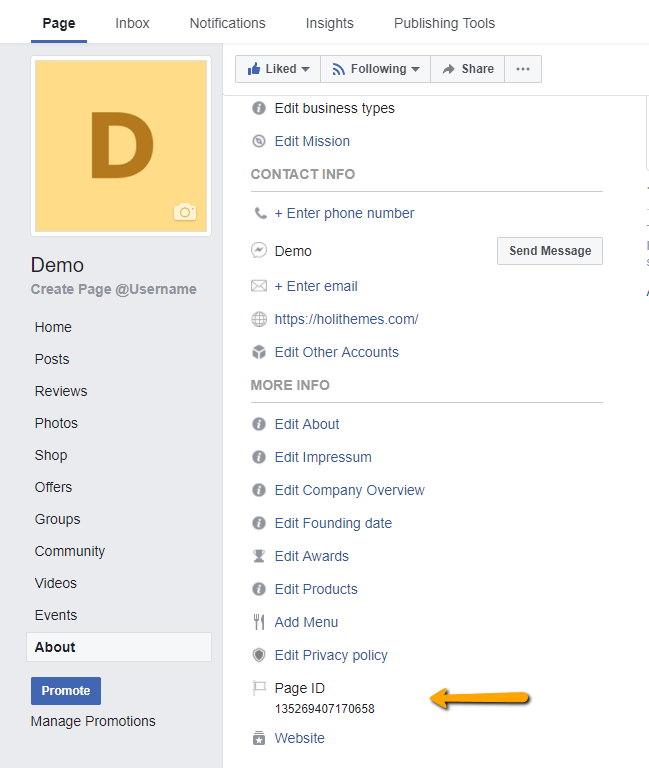
  • Facebook Page ID : You can easily find the Page ID in Facebook Page > About > Page ID or go to https://findmyfbid.com/ to find your Page ID from URL.

Config Facebook Page Setting

You need to add your website address to Facebook Page Whitelisted Domains to authorize the Facebook Page Messenger. Go to Page > Settings > Messenger Platform > Whitelisted Domains.

Add shortcode to website

WP-Chatbot will provides you the shortcode to show Facebook Live Chat in your website front-end. The shortcode will depends on what you set on WP-Chatbot Settings > Shortcode name. By default, the shortcode is [chatbot].

You can put this anywhere on your website to show the Facebook Live Chat. In this example, I would use Text widget to paste this shortcode and place it in any Sidebar of your theme.

Please note : Where ever you place the shortcode, then the Facebook Live Chat will only be displayed in the bottom right corner of the site.


WordPress Plugins

Add Tooltip Glossary to your WordPress

January 31, 2018

Are you a Word Press user which own an educational site or a personal blog with niche topics? You are tired of having to explain the technical terms to the reader over and over. If so, congratulation! You’ve come to the right place. In this blog post, I’m going to show you how to create a glossary using the free CMP glossary tooltip plugin. Yes, it’s a kind of “Write less, do more” 😉

First, get the plugin at https://wordpress.org/plugins/enhanced-tooltipglossary/.

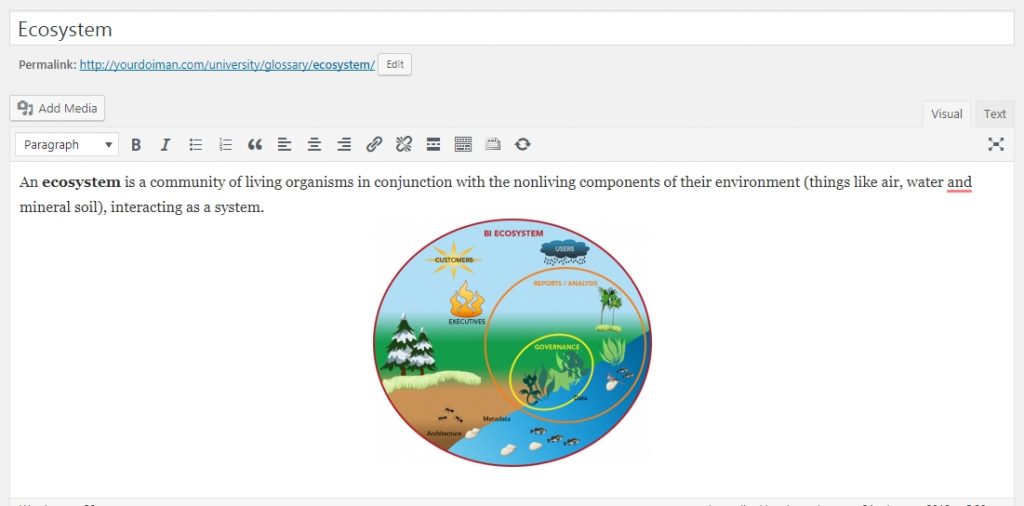
Once the plugin is installed and activated, you can easily start defending your terms by going to CMP Glossary Tooltip > Add New. The title of the page should be the term, the body content should be the definition. You are free to add content to


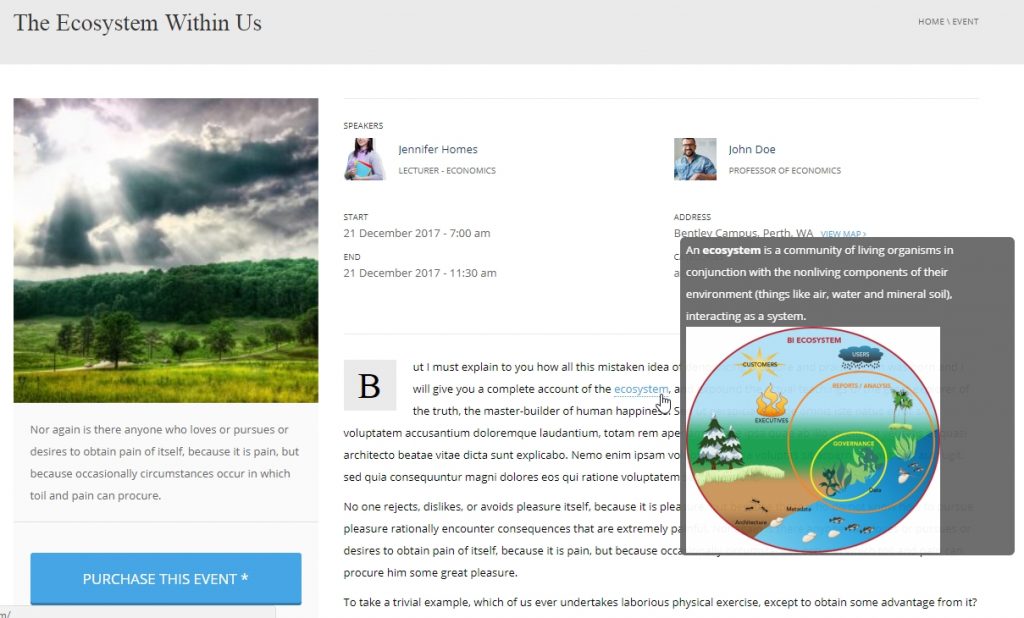
The plugin will scan your posts or pages for defined glossary terms, by adding links to a glossary term page that contains the definition of the term used. When users hover over a specific term, it displays a tooltip containing the definition of this term. You can take a look at this example to see how it work in our University theme:


Although this tooltip limits 500 terms for the free version, it allows you to add unlimited tooltips to a site or within a glossary of terms. Another plus point is that it also creates a responsive glossary index with all tooltip glossary terms used for your site, hence readers can quickly find the term they want.


In my opinion, many webmasters can build a small encyclopedia or dictionary for their website within this plugin. Many others possibly want to have more advanced functions such as related terms, abbreviations, variations, synonyms etc. The hint is the Pro version of CM Tooltip Glossary.

That’s why we love Word Press, isn’t it? You have a great free version to use as long as you want. And there’s always a premium version to explore more features 🙂

Wordpress Developer, WordPress Plugins

The best Meta Box plugins in WordPress

January 29, 2018

1, Option Tree

Option Tree – WordPress.Org

Option Tree – GitHub

OptionTree attempts to bridge the gap between WordPress developers, designers and end-users by creating fully responsive option panels and meta boxes with an ease unlike any other plugin. OptionTree has many advanced features with well placed hooks and filters to adjust every aspect of the user experience.

Build your Theme Options panel locally with an easy to use drag & drop interface and then export a functioning `theme-options.php` file for production use that is i18n translation ready, with your custom text domain automatically inserted.

And, in just a few simple lines of code, save settings to the database with a unique array ID so none of your Theme Options conflict with other themes that use OptionTree.

Also, OptionTree now takes full advantage of the new color schemes introduced in WordPress 3.8, it looks and feels built-in.

2, Meta Box By MetaBox.io

– Plugin URL: https://wordpress.org/plugins/meta-box/

A lightweight & feature-rich WordPress plugin that helps developers to save time building advanced custom fields and meta boxes in WordPress.

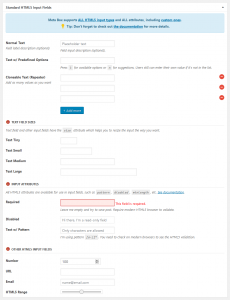
The plugin provides a wide range of field types and a lot of options to for each field type, which gives you unlimited possibility to control and customize the custom fields.


3, CMB2 by CMB2 team

– CMB2  URL: https://cmb2.io/

– CMB2 – WordPress.Org: https://wordpress.org/plugins/cmb2/

CMB2 is a developer’s toolkit for building metaboxes, custom fields, and forms for WordPress that will blow your mind. Easily manage meta for posts, terms, users, comments, or create custom option pages.

FEATURES:

  • Create metaboxes to be used on post edit screens.
  • Create forms to be used on an options pages.
  • Create forms to handle user meta and display them on user profile add/edit pages.
  • Create forms to handle term meta and display wherever your taxonomies are used.
  • Flexible API that allows you to use CMB forms almost anywhere, even on the front-end.
  • Several field types are included.
  • Custom API hook that allows you to create your own field types.
  • There are numerous hooks and filters, allowing you to modify many aspects of the library (without editing it directly).
  • Repeatable fields for most field types are supported, as well as repeatable field groups.
  • CMB2 is safe to bundle with any project. It will only load the newest version in the system.


WordPress Plugins

How to get Disqus Comment for WordPress Website

January 8, 2018

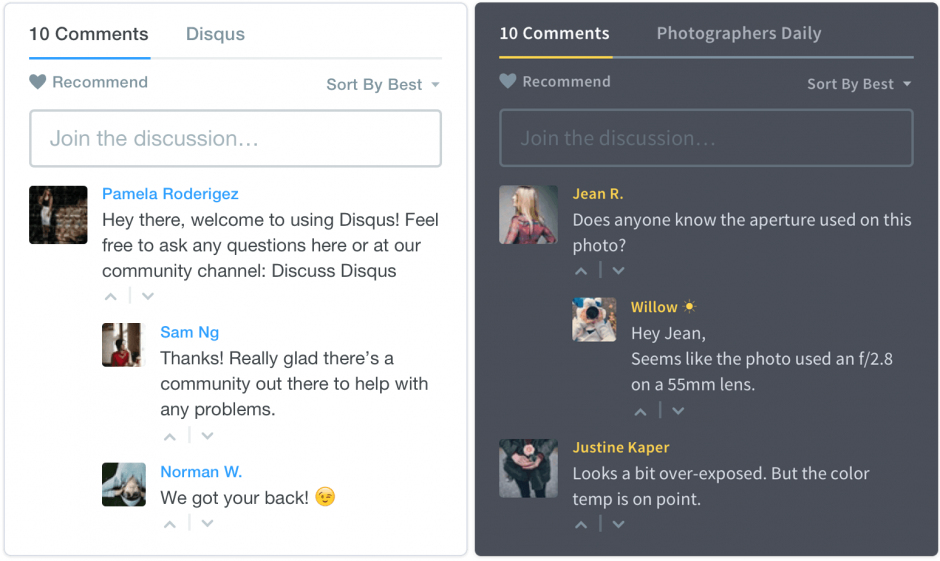
Disqus is a popular network comments platform which is trusted by hundreds of thousands sites to feature the comment system with social network integration. Disqus Comments has a good looking, it works perfectly on all devices from desktop to mobile and especially it supports over than 70 languages.

Disqus Comment System plugin official released by Disqus will help you to bring Disqus Comment to your WordPress website easily.

However, there are still some steps that you need to get through to accomplish the Disqus installation progress on your site.

This article will be very helpful if you wanna install Disqus Comment System on your WordPress Site.

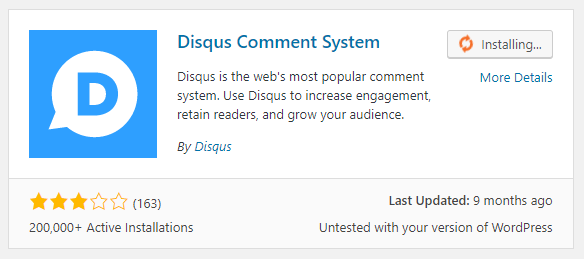
  1. First of all, you need to download and install Disqus Comment System on WordPress Plugins site.
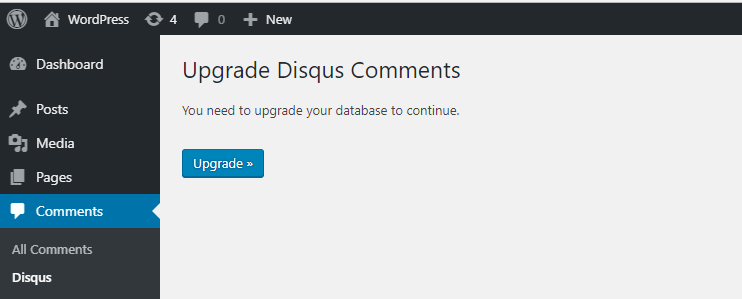
  2. Go to Dashboard > Comments > Disqus and click on Upgrade button in Upgrade Disqus Comments screen.
  3. After done of upgrading, Disqus would require user login to install Disqus Comments. If you have not account yet, please move to the next step.
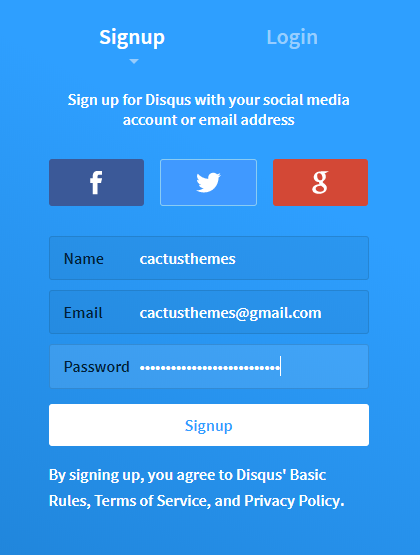
  4. Go to Disqus Signup/Login to register your Disqus account, you need to fill-in all fields to accomplish account signup
  5. After Signup successfully, you will be redirected to Create a new site page. Website Name can be anything that you want to name for your new site, and select proper Category for this site.
  6. In Select Plan page, you can select your wanted plan for this site, in this case I would use Basic plan, which is Free and Ads supported.
  7. In the next step, you will need to choose the platform that your site is on, and of course, the platform we are working on is WordPress.
  8. After selecting the platform, you will see the Install instructions which we have done already.
  9. After this step, please get back to WordPress Dashbard > Comments > Disqus and Login your Disqus Account to complete the installation.
  10. Then you will get the Disqus Comment System on your WordPress Site which would be replaced completely for default Comment form from your current WordPress theme.

Note :

  • Disqus Comment System will override the default Comment system from WordPress, so all of your old Comment data will not be loaded in Disqus Comment.
  • To configure Disqus Comment on your site, you need to the URL that you have been created on Disqus to moderate it. Or you can go to Dashboard > Comments > Disqus to find the link to Go to Disqus Moderation.
WordPress Plugins

How to use the lightbox effect  to post images

January 2, 2018

In this post, I’m going to introduce an interesting plugin named Responsive Lightbox by dFactory (free on WordPress.org). This plugin enables the light effect on all images in your post content easily

1.Install Lightbox Plugin

To install Lightbox Plugin incluses 3 steps:

  • Step 1: Go to Plugin > Add New
  • Step 2: Enter Keyword plugin in search box  and click on “Install Now”
  •   Step 3: Click on  “Activate”

2. Use  the lightbox effect  to single images

  • Step 1: go to Setting > Responsive Lightbox
  • Step 2: In the General tab, Choose Default lightbox, Single image title and click on “Images”
  • Step 3: Hit  “Save”
  • Step 4: to Advance Setting, go to Lightbox tab and click on “Your Default lightbox” (PrettyPhoto). After, Select Animation speed, next to click on “Slideshow”. Beside, you can setting for  the opacity 
  • Step 5: Click on “Save”
  • Step 6: Create a Post with format post is Image. Then,  Click on “Add Media” and Select “Link to  Media File” and Click on “Insert into post” and Hit “Publish”.
  • Step 7: The Result is:
CactusThemes Users, WordPress Plugins

BULK IMPORT VIDEOS PLUGINS FOR WORDPRESS

December 29, 2017

As team author of CactusThemes – provider of 3 well-known Video Themes: VideoPro, TrueMag, and NewsTube, we received numerous questions about what’s plugin to bulk import videos to the themes and its features. Today, we summarize both Pros & Cons of 3 popular plugins with some reviews especially regard to videos import. Hopefully, it will help you make a good choice. Here we go!

1. WordPress Automatic plugin – 25$

This powerful plugin offers you the widest range of content sources to import data: Youtube, Vimeo, Dailymotion, Facebook, Twitter, etc. In my opinion, the key feature of the plugin is it imports content by campaigns. Let’s imagine, you have a plan to import YouTube videos, another for Facebook posts, and they both work automatically to fetch content into your site. That’s why the author calls it auto-pilot plugin

Download link            Document                  Video tutorial

PROs

  • Support to import data from 19 content-sharing networks
  • Quick & easily manage your import plans via campaigns
  • A lot of options to import video: by Channel, Playlist, single or multiple videos import by IDs.
  • Can fetch many YouTube statistics: Views, Likes, Dislikes, Comments counts
  • Import YouTube tags, comments without add-on – really a plus point

 CONs

  • Old-fashion plugin interface possibly makes you feel bored while using
  • Its document is just the explanation of the plugin options. There was lack of examples and demos.
  • Some advanced options such as Add custom fields to the post requires technical knowledge to handle

REVIEW

An effective plugin at a reasonable price for all but it’s strongly recommended for experienced WordPress users.
2.     WordPress Video Robot plugin – 36$

Download link            Document                  Video tutorial

PROs

  • Rich sources of reference materials including document and video tutorials for beginners
  • The plugin author even build demo for VideoPro, TrueMag, NewsTube themes with tutorials
  • Modern & catchy plugin interface which options explanations & illustrations
  • Once installed, the plugin auto fills the Youtube, Vimeo & Dailymotion API keys for users.
  • Responsive support team for plugin fixes bugs and usage

CONs

  • You have to install theme-fix add-on to make the plugin work with your theme.
  • Plugin options and settings are scattered in various sections may confuse users at the beginning
  • Work really slow compare to the other plugins.
  • Technically, if you import video follow the default WordPress video post format, the plugin adds many custom fields to the post data which reduce processing speed.
  • In case, you import video using the custom WPVR post type, it may cause some compatibility issues with the theme.
  • You have to buy premium add-ons for more functionalities. For example, it costs 19,9$ to get Comment Importer add-on while WordPress automatic plugin supplies a built-in option to import comments from YouTube, Facebook, etc.
  • Currently, the plugin doesn’t support to fetch data of likes, dislikes, comments count from YouTube but the author planned to make it work in the next release. (So I will delete this point afterward :D)

REVIEW

It’s now a recent trending plugin with friendly interface. Although we don’t appreciate the of the plugin stability at this time, the plugin developers actively update to improve plugin functions.

3.     YouTube WordPress plugin – 36$

Download link            Document                  Video tutorial

PROs

  • Fast and straight-forward to operate
  • Support to import videos by ID, Channel, user uploads or playlists.
  • Synchronize your YouTube channels with your WordPress site.
  • You can select any number of videos from YouTube when doing bulk import
  • Can be customized to fill any custom fields needed to display your videos

CONs

  • Support only one video source: YouTube
  • It seems to be a quite pricey plugin for import content

REVIEW

Set at a dear price, however, this plugin only helps you to import video from Youtube network. Probably, the advantages of the plugin are its speed & convenience and the ability to synchronizing videos from your YouTube channel.

The bottom line

Within this blog post, maybe, we didn’t completely cover all the advantages and limitations of these plugins. By our hands-on experience, we use WP Automatic for two main reasons: speed and performance. How about you? Have you found the one that suits you best? Please feel free to share your thought and ideas.

WordPress Plugins

How to attach images to multiple posts

December 4, 2017

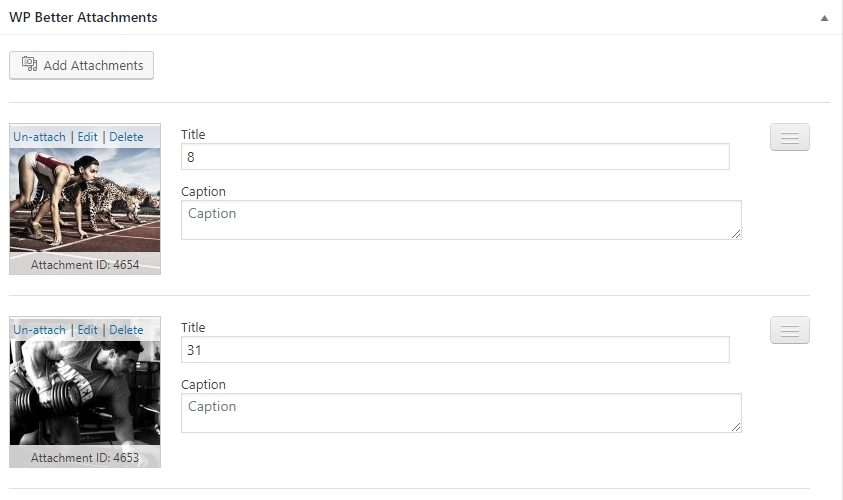
By default, WordPress does not allow to associate attachments between the posts. This means if you uploaded image X to post A, and you want to attach image X to post B, you must un-attach from post A or you need to upload image X twice. So there are some troubles when you make the galleries. To improve, you can use WP Better Attachments plugin. This plugin lets you attach  images to multiple posts without uploading twice.
If you are using theme from Cactusthemes, this plugin indeed is helpful. It helps you create the gallery or video screenshots easily and quickly.

Download plugin here: https://wordpress.org/plugins/wp-better-attachments/ 

After installing it, your post/page editor will be added this button to quickly add the attachments…

…and this section to manage the added attachments (un-attach/edit/delete)

As we mentioned previously, this plugin helps you attach the images from Media Library (images that uploaded for other posts/pages). No need to upload the same images twice.

Using this plugin for the themes come from Cactusthemes, just attach the images to the Gallery post or Video post, the image gallery and video screenshots preview will be created automatically.

Video screenshots preview

Image gallery