Debug is an indispensable part of Website Development as it helps developers detect bugs in most cases. If you are working on local and a test site, it doesn’t need to think twice to turn on the WordPress Debug Mode to check bugs.
However, when your website has launched already, displaying the error messages will annoy any visitors. It’s time to go with Debug Log and Debug Display. So, what’re they?
- WP_DEBUG_DISPLAY will manage the display of error messages on all of your pages
- WP_DEBUG_LOG can record all error messages to a debug.log file
That’s why we should use these statements in a conjunction to turn on debug without showing error messages on the site. Here we go.
Step 1:
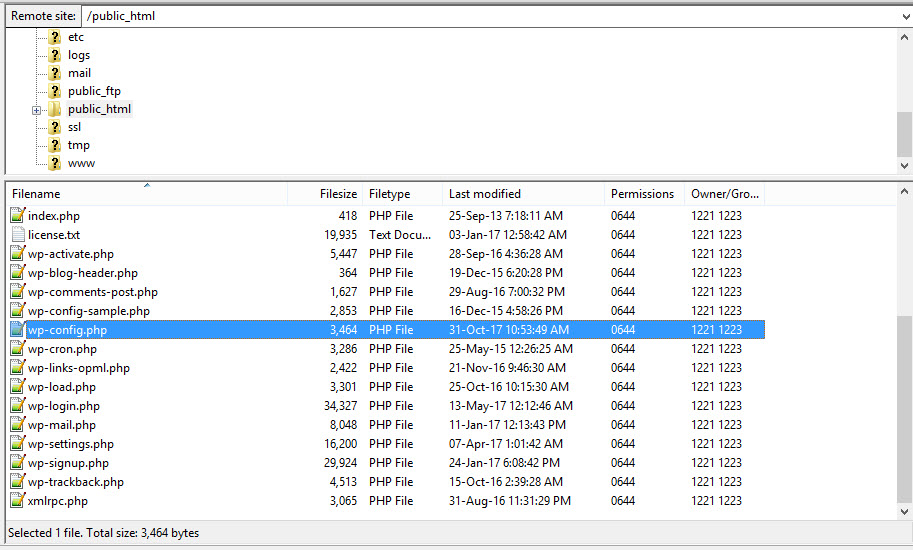
Connect to your FTP or login to cPanel > File Manager and browse to your-wordpress-folder/wp-config.php file
Step 2:
Find this line of code “define(‘WP_DEBUG’, false);”

Step 3:
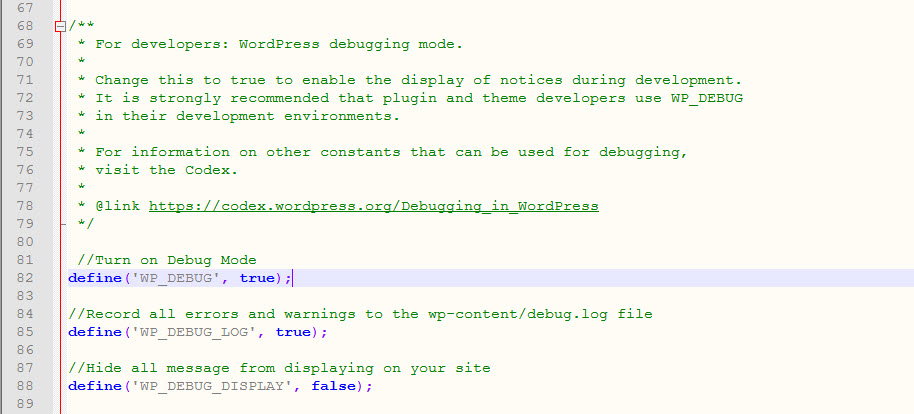
Turn on the Debug Mode by changing the status from “false” to “true” and add these two statements:
define(‘WP_DEBUG_DISPLAY’, false);
It will look something like this:

Step 4:
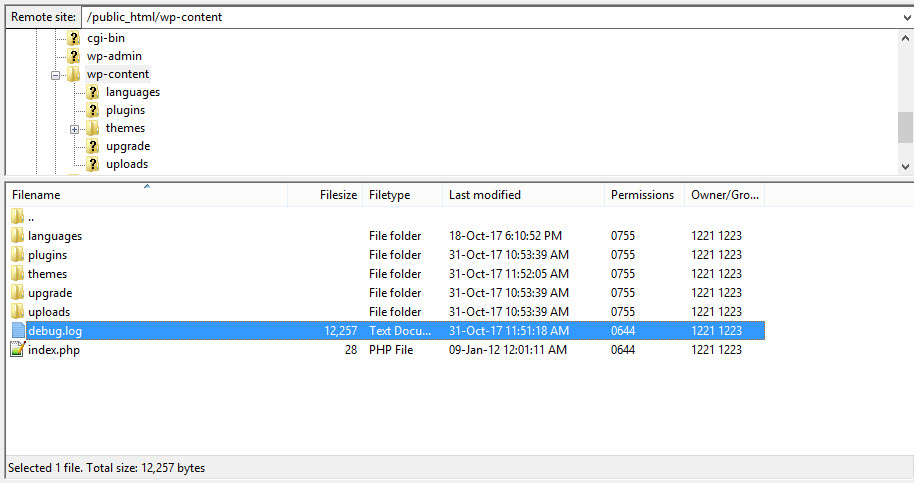
Don’t forget to save the changes, then go to the “wp-content/debug.log” file to discover the result.

It’s easy, right? Hopefully, this quick guide is helpful for not just developers but also ordinary users. Please feel free leave a comment if you have any feedback. And don’t forget to check out other blog posts for more interesting stuffs 😉


