Browsing Category

Wordpress Developer

Wordpress Developer

How To Add New Option Types To Option Tree

May 15, 2018

You can do this by adding the following code without ever editing the core files in OptionTree.
When you add new options, there are two requirements.

Step 1:  Function must be prepended with ot_type_:               


if ( ! function_exists( ‘ot_type_custom_post_checkbox’ ) ) {function ot_type_custom_post_checkbox( $args = array() ) {/* Add custom code here */
}}

Step 2:  when adding to the array of options your new array keys need to match the function name minus ot_type_,  ot_type_custom_post_checkbox you could add it to the filtered array by following code:                   


function unidash_add_custom_option_types( $types ) {
$types['custom_post_checkbox'] = 'Custom Post Type Checkbox option type';
return $types;
}


Step3: You can add new option type like another option type in option tree   

array(
‘id’ => ‘search_exclude_cpt’,
‘label’ => esc_html__( ‘Exclude Custom Post Type’, ‘unidash’ ),
‘desc’ => esc_html__( ‘Exclude Custom Post Type from Search Results’, ‘unidash’ ),
‘type’ => ‘custom_post_checkbox’,
‘section’ => ‘search’,
‘operator’ => ‘and’,),

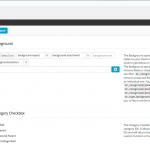
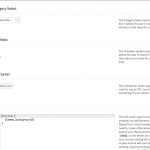
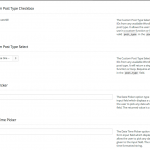
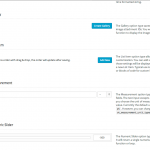
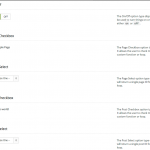
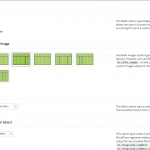
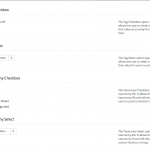
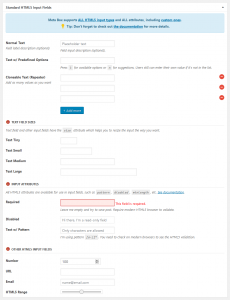
Ok, finally you can create new option types like this:


Wordpress Developer

Action & Filter in WordPress

March 7, 2018

What’s Action hook ?

In WordPress; an Action is a PHP function that is executed at specific points throughout the WordPress Core.

Developers can create a custom Action using the Action API to add or remove code from an existing Action by specifying any existing Hook. This process is called “hooking”.

add_action( string $tag, callable $function_to_add, int $priority = 10, int $accepted_args = 1 );

Parameters:
$tag
(string) (Required) The name of the action to which the $function_to_add is hooked.

$function_to_add
(callable) (Required) The name of the function you wish to be called.

$priority
(int) (Optional) Used to specify the order in which the functions associated with a particular action are executed. Lower numbers correspond with earlier execution, and functions with the same priority are executed in the order in which they were added to the action.

Default value: 10

$accepted_args
(int) (Optional) The number of arguments the function accepts.

Default value: 1

Return
(true) Will always return true.

For example with existing action: A developer may want to add code to the footer of a Theme. This could be accomplished by writing new function, then Hooking it to the wp_footer Action.

<?php
function your_function() {
echo '<p>This is inserted at the bottom</p>';
}
add_action( 'wp_footer', 'your_function' );
?>

For example with custom action: do_action creates an action hook, add_action executes hooked functions when that hook is called.

do_action( 'my_footer_hook' );

Which you can use in the callback function
add_action( 'my_footer_hook', 'my_footer_echo' );
function my_footer_echo(){
echo 'hello world';
}


What’s Filter hook ?

WordPress offers filter hooks to allow plugins to modify various types of internal data at runtime.

A plugin can modify data by binding a callback to a filter hook. When the filter is later applied, each bound callback is run in order of priority, and given the opportunity to modify a value by returning a new value.

add_filter( string $tag, callable $function_to_add, int $priority = 10, int $accepted_args = 1 );

Parameters
$tag
(string) (Required) The name of the filter to hook the $function_to_add callback to.

$function_to_add
(callable) (Required) The callback to be run when the filter is applied.

$priority
(int) (Optional) Used to specify the order in which the functions associated with a particular action are executed. Lower numbers correspond with earlier execution, and functions with the same priority are executed in the order in which they were added to the action.

Default value: 10

$accepted_args
(int) (Optional) The number of arguments the function accepts.

Default value: 1

Return
(true)


For example with existing filter: the_content

<?php
function cactus_content_filter( $content ) {
$find = 'hello';
$replacement = "<strong>hello</strong>";
$content = str_replace( $find, $replacement, $content );
return $content;
}
?>

<?php
add_filter( 'the_content', 'cactus_content_filter' );
?>

WordPress plugin API has an extensive list of filter hooks available in WordPress.

For example with custom filter:

<?php
$copyright = 'Design by CactusThemes';
echo apply_filters( 'cactus_copyright', $copyright );
?>

Result: Design by CactusThemes.

<?php
function cactus_copyright_filter( $content ) {
$content = 'Copyright by CactusThemes'
return $content;
}
?>

<?php
add_filter( 'cactus_copyright', 'cactus_copyright_filter' );
?>

Result: Copyright by CactusThemes.

All the above examples are working examples. If you have a test installation of WordPress to play with, you can try using the code above in the functions.php in your child theme.


Wordpress Developer, WordPress Plugins, WordPress Tips

How to use URL field in Visual Composer

February 28, 2018

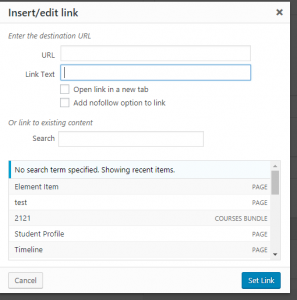
URL field of Visual Composer is “vc_link” param type. The user can use this field to search and add a link of post/page… link exactly and easy. Besides, that user can type link directly like another text field. Moreover, the user can add target attribute equal “_blank” to open link in a new tab and add rel attribute equal “nofollow” for SEO campaign.
Url Field Setting

1. Add the URL field to your custom element

Visual Composer already has an URL field and we only need to add it to custom code.

2. Manage and edit the HTML

3. Result and Complete Code

Wordpress Developer, WordPress Plugins

The best Meta Box plugins in WordPress

January 29, 2018

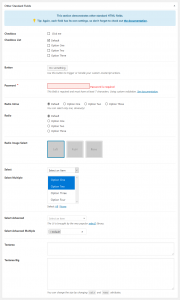
1, Option Tree

Option Tree – WordPress.Org

Option Tree – GitHub

OptionTree attempts to bridge the gap between WordPress developers, designers and end-users by creating fully responsive option panels and meta boxes with an ease unlike any other plugin. OptionTree has many advanced features with well placed hooks and filters to adjust every aspect of the user experience.

Build your Theme Options panel locally with an easy to use drag & drop interface and then export a functioning `theme-options.php` file for production use that is i18n translation ready, with your custom text domain automatically inserted.

And, in just a few simple lines of code, save settings to the database with a unique array ID so none of your Theme Options conflict with other themes that use OptionTree.

Also, OptionTree now takes full advantage of the new color schemes introduced in WordPress 3.8, it looks and feels built-in.

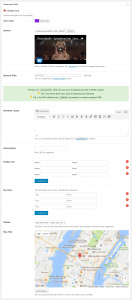
2, Meta Box By MetaBox.io

– Plugin URL: https://wordpress.org/plugins/meta-box/

A lightweight & feature-rich WordPress plugin that helps developers to save time building advanced custom fields and meta boxes in WordPress.

The plugin provides a wide range of field types and a lot of options to for each field type, which gives you unlimited possibility to control and customize the custom fields.


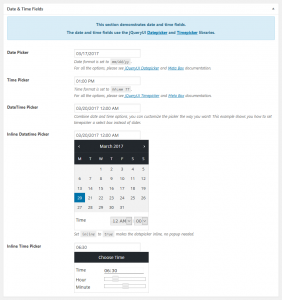
3, CMB2 by CMB2 team

– CMB2  URL: https://cmb2.io/

– CMB2 – WordPress.Org: https://wordpress.org/plugins/cmb2/

CMB2 is a developer’s toolkit for building metaboxes, custom fields, and forms for WordPress that will blow your mind. Easily manage meta for posts, terms, users, comments, or create custom option pages.

FEATURES:

  • Create metaboxes to be used on post edit screens.
  • Create forms to be used on an options pages.
  • Create forms to handle user meta and display them on user profile add/edit pages.
  • Create forms to handle term meta and display wherever your taxonomies are used.
  • Flexible API that allows you to use CMB forms almost anywhere, even on the front-end.
  • Several field types are included.
  • Custom API hook that allows you to create your own field types.
  • There are numerous hooks and filters, allowing you to modify many aspects of the library (without editing it directly).
  • Repeatable fields for most field types are supported, as well as repeatable field groups.
  • CMB2 is safe to bundle with any project. It will only load the newest version in the system.


Wordpress Developer

Change PHP configuration options without editing php.ini

January 2, 2018

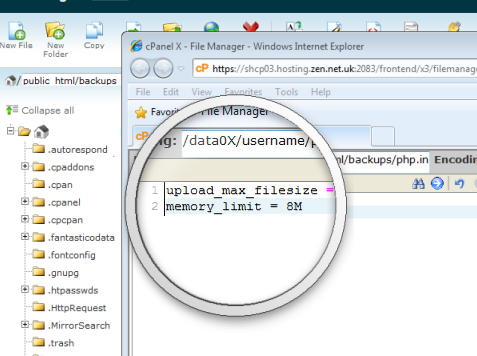
PHP options is usually already configured at the server of your website. In many cases, the PHP configurations is set up with limited numbers that will not fit and meet your needs. For example, you can change the upload max size to increase the file size that you want to upload or the max execution time to run a script.

Normally, all of PHP settings are located in php.ini file of PHP directory on your server. However, in most cases if you are on shared host, you will not be able to find and edit this php.ini file.

Changing PHP configurations is necessary to extend that limit. And to change the PHP configuration, the easiest way is to contact the hosting service provider for support. In addition, you also can change the PHP configuration by one of three ways below.

1. Edit Theme Functions file

Some cases will be solved easily by using ini_set function to set PHP configuration from theme function file by this syntax.

@ini_set( '{option_name}' , '{value_to_set}' );

For example, if you want to change the upload_max_filesize to 64M, the completed syntax would be like this

@ini_set( 'upload_max_size' , '64M' );

Note : Not all the available options can be changed using ini_set(). There is a list of all available options in the appendix.

2. Edit htaccess file

In the root directory, you can find .htaccess file easily. And you can use this syntax to change the PHP configuration options.

php_value {option_name} {value_to_set}

For example, if you want to change the upload_max_filesize to 64M, the completed syntax would be like this

php_value upload_max_filesize 64M

And please note that these tricks may not work in some cases which hosting provider doesn’t allow to override the PHP configuration options. Then you need to contact your web hosting providers to get these changes.

Wordpress Developer

How to use Autocomplete param type in Visual Composer

December 19, 2017

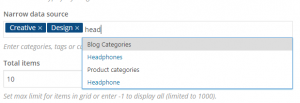
The parameter Autocomplete suggests for you: post, page, custom post type, categories, custom taxonomies by your keywords.
So you can select which one you need easily. By default, you usually use in Post Grid Shortcode, Post Masonry Shortcode
Autocomplete in Visual Composer Post Grid Shortcode Autocomplete in Post Masonry Shortcode

And if you want to use this Autocomplete param type in your shortcode, please follow some steps below:

1. Create Function to gell post result by suggested keyword or post id:


function felis_blog_post_autocomplete_suggester( $query) {
global $wpdb;
$post_id = (int) $query;
$post_results = $wpdb->get_results( $wpdb->prepare( "SELECT a.ID AS id, a.post_title AS title FROM {$wpdb->posts} AS a
WHERE a.post_type = 'post' AND a.post_status != 'trash' AND ( a.ID = '%d' OR a.post_title LIKE '%%%s%%' )", $post_id > 0 ? $post_id : - 1, stripslashes( $query ), stripslashes( $query ) ), ARRAY_A );
$results = array();
if ( is_array( $post_results ) && ! empty( $post_results ) ) {
foreach ( $post_results as $value ) {
$data = array();
$data['value'] = $value['id'];
$data['label'] = $value['title'];
$results[] = $data;
}
}
return $results;
}

2. Add function in step 1 to vc_autocomplete posts_callback filter:

add_filter( 'vc_autocomplete_felis_content_slider_2_posts_callback', 'felis_blog_post_autocomplete_suggester', 10, 1 );

felis_content_slider_2 is your shortcode base name.

3. Create function render result in step 1:


function felis_post_autocomplete_suggester_render( $query ) {
$query = trim( $query['value'] );

    // get value from requested
if ( ! empty( $query ) ) {
$post_object = get_post( (int) $query );
if ( is_object( $post_object ) ) {
$post_title = $post_object->post_title;
$post_id = $post_object->ID;
$data = array();
$data['value'] = $post_id;
$data['label'] = $post_title;
return ! empty( $data ) ? $data : false;
}
return false;
}
return false;
}

4. Add function in step 3 to vc autocomplete posts render:

add_filter( 'vc_autocomplete_felis_content_slider_2_posts_render', 'felis_post_autocomplete_suggester_render', 10, 1 );

felis_content_slider_2 is your shortcode base name.

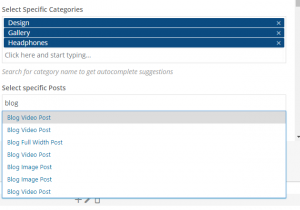
In conclusion, you can use Autocomplete param type in your shortcode like this:
Autocomplete in Felis Content Slider 2 Shortcode