Archives

WordPress Tips, WordPress Tutorials

MySQL manipulation with WordPress

June 9, 2018

WordPress is the leading blogging platform. In the last decade or so, it has been adopted as a great platform for building dynamic websites. The reason for its increased popularity can be attributed to its huge community and user-friendly interface. One thing that most people don’t know is that this platform is PHP based and uses MySQL database as the backend database.

MySQL is a database management system that is used by WordPress to store and retrieve all your blog information. MySQL is an open source relational database management system. It runs as a server and allows multiple users to manage and create numerous databases.

This article will provide some important guidelines when manipulation your MySQL database manually for your website or blog with wordpress

WordPress provides a global object variable, $wpdb, which is an instantiation of the wpdb class defined in /wp-includes/wp-db.php. By default, $wpdb is instantiated to talk to the WordPress database. To access $wpdb in your WordPress PHP code, declare $wpdb as a global variable using the global keyword, or use the superglobal $GLOBALS in the following manner:

Example:

// 1st Method – Declaring $wpdb as global and using it to execute an SQL query statement that returns a PHP object

global $wpdb;
$results = $wpdb->get_results( "SELECT * FROM {$wpdb->prefix}options WHERE option_id = 1", OBJECT );

// 2nd Method – Utilizing the $GLOBALS superglobal. Does not require global keyword ( but may not be best practice )

$results = $GLOBALS['wpdb']->get_results( "SELECT * FROM {$wpdb->prefix}options WHERE option_id = 1", OBJECT );

Assuming that the table prefix is wp_:

$wpdb->posts will correspond to wp_posts table
$wpdb->postmeta will correspond to wp_postmeta table
$wpdb->users will correspond to wp_users table

INSERT ROWS

Insert a row into a table. This function returns false if the row could not be inserted. Otherwise, it returns the number of affected rows (which will always be 1).

$wpdb->insert( $table, $data, $format );

Parameters

table
(string) The name of the table to insert data into.
data
(array) Data to insert (in column => value pairs). Both $data columns and $data values should be “raw” (neither should be SQL escaped).
format
(array|string) (optional) An array of formats to be mapped to each of the values in $data. If string, that format will be used for all of the values in $data. If omitted, all values in $data will be treated as strings unless otherwise specified in wpdb::$field_types.

Examples

$wpdb->insert( 'table', array( 'column1' => 'value1', 'column2' => 123 ), array( '%s', '%d' ) );

UPDATE ROWS

Update a row in the table. Returns false if errors, or the number of rows affected if successful.

$wpdb->update( $table, $data, $where, $format = null, $where_format = null );

Parameters

table
(string) The name of the table to update.
data
(array) Data to update (in column => value pairs). Both $data columns and $data values should be “raw” (neither should be SQL escaped). This means that if you are using GET or POST data you may need to use stripslashes() to avoid slashes ending up in the database.
where
(array) A named array of WHERE clauses (in column => value pairs). Multiple clauses will be joined with ANDs. Both $where columns and $where values should be “raw”.
format
(array|string) (optional) An array of formats to be mapped to each of the values in $data. If string, that format will be used for all of the values in $data.
where_format
(array|string) (optional) An array of formats to be mapped to each of the values in $where. If string, that format will be used for all of the items in $where.
Possible format values: %s as string; %d as integer (whole number) and %f as float. (See below for more information.) If omitted, all values in $where will be treated as strings.

Examples

$wpdb->update( ‘table’, array(
‘column1’ => ‘value1’, // string
‘column2’ => ‘value2’ // integer (number)
),
array( ‘ID’ => 1 ),
array(
‘%s’, // value1
‘%d’ // value2
),
array( ‘%d’ )
);

DELETE ROWS

The delete function was added in WordPress 3.4.0, and can be used to delete rows from a table. It returns the number of rows updated, or false on error.

$wpdb->delete( $table, $where, $where_format = null );

Parameters

$table
(string) (required) Table name.
Default: None
$where
(array) (required) A named array of WHERE clauses (in column -> value pairs). Multiple clauses will be joined with ANDs. Both $where columns and $where values should be ‘raw’.
Default: None
$where_format
(string/array) (optional) An array of formats to be mapped to each of the values in $where. If a string, that format will be used for all of the items in $where. A format is one of ‘%d’, ‘%f’, ‘%s’ (integer, float, string; see below for more information). If omitted, all values in $where will be treated as strings unless otherwise specified in wpdb::$field_types.
Default: null

Examples
// Default usage.
$wpdb->delete( 'table', array( 'ID' => 1 ) );

// Using where formatting.
$wpdb->delete( 'table', array( 'ID' => 1 ), array( '%d' ) );


And to find out more about $wpdb, you can visit the following link: WordPress Codex

Finally, we hope the above information will help you work better MySQL with WordPress

Too see more awesome entry from Cactusthemes, please visit our Blog!

WordPress Plugins, WordPress Tips

Simple Way To Get Free SSL Certificates (HTTPS) For Your Website

March 28, 2018

Google finally released the official SSL Certificates (https) for website with custom domain how I can get it ? just follow this tutorial.

Using plugin: Really Simple SSL 

Description

Really Simple SSL automatically detects your settings and configures your website to run over https.
To keep it lightweight, the options are kept to a minimum. The entire site will move to SSL.

THREE SIMPLE STEPS FOR SETUP:

  • Get an SSL certificate (can’t do that for you, sorry).
  • Activate this plugin
  • Enable SSL with one click

Screenshot:


Congrats! Now your website has a unique SSL certificate which will surely enhance an extra layer of security to your website. Now check your website with https:// and enjoy free SSL.

I hope you like this in-depth guide/tutorial, and I’m sure that this tutorial will help you take your blogger blog to the next level and it will improve your ranking in all search engines. If you’ve got any problem or you’ve stuck on any step then feel free to ask in comments, and if you appreciate this post then, please do share this post to let more people know about this trick, after all, sharing is caring.

If you have any question, feel free to comment on the comment section down below.

Wordpress Developer

Action & Filter in WordPress

March 7, 2018

What’s Action hook ?

In WordPress; an Action is a PHP function that is executed at specific points throughout the WordPress Core.

Developers can create a custom Action using the Action API to add or remove code from an existing Action by specifying any existing Hook. This process is called “hooking”.

add_action( string $tag, callable $function_to_add, int $priority = 10, int $accepted_args = 1 );

Parameters:
$tag
(string) (Required) The name of the action to which the $function_to_add is hooked.

$function_to_add
(callable) (Required) The name of the function you wish to be called.

$priority
(int) (Optional) Used to specify the order in which the functions associated with a particular action are executed. Lower numbers correspond with earlier execution, and functions with the same priority are executed in the order in which they were added to the action.

Default value: 10

$accepted_args
(int) (Optional) The number of arguments the function accepts.

Default value: 1

Return
(true) Will always return true.

For example with existing action: A developer may want to add code to the footer of a Theme. This could be accomplished by writing new function, then Hooking it to the wp_footer Action.

<?php
function your_function() {
echo '<p>This is inserted at the bottom</p>';
}
add_action( 'wp_footer', 'your_function' );
?>

For example with custom action: do_action creates an action hook, add_action executes hooked functions when that hook is called.

do_action( 'my_footer_hook' );

Which you can use in the callback function
add_action( 'my_footer_hook', 'my_footer_echo' );
function my_footer_echo(){
echo 'hello world';
}


What’s Filter hook ?

WordPress offers filter hooks to allow plugins to modify various types of internal data at runtime.

A plugin can modify data by binding a callback to a filter hook. When the filter is later applied, each bound callback is run in order of priority, and given the opportunity to modify a value by returning a new value.

add_filter( string $tag, callable $function_to_add, int $priority = 10, int $accepted_args = 1 );

Parameters
$tag
(string) (Required) The name of the filter to hook the $function_to_add callback to.

$function_to_add
(callable) (Required) The callback to be run when the filter is applied.

$priority
(int) (Optional) Used to specify the order in which the functions associated with a particular action are executed. Lower numbers correspond with earlier execution, and functions with the same priority are executed in the order in which they were added to the action.

Default value: 10

$accepted_args
(int) (Optional) The number of arguments the function accepts.

Default value: 1

Return
(true)


For example with existing filter: the_content

<?php
function cactus_content_filter( $content ) {
$find = 'hello';
$replacement = "<strong>hello</strong>";
$content = str_replace( $find, $replacement, $content );
return $content;
}
?>

<?php
add_filter( 'the_content', 'cactus_content_filter' );
?>

WordPress plugin API has an extensive list of filter hooks available in WordPress.

For example with custom filter:

<?php
$copyright = 'Design by CactusThemes';
echo apply_filters( 'cactus_copyright', $copyright );
?>

Result: Design by CactusThemes.

<?php
function cactus_copyright_filter( $content ) {
$content = 'Copyright by CactusThemes'
return $content;
}
?>

<?php
add_filter( 'cactus_copyright', 'cactus_copyright_filter' );
?>

Result: Copyright by CactusThemes.

All the above examples are working examples. If you have a test installation of WordPress to play with, you can try using the code above in the functions.php in your child theme.

Wordpress Developer, WordPress Plugins

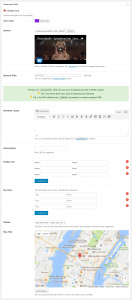
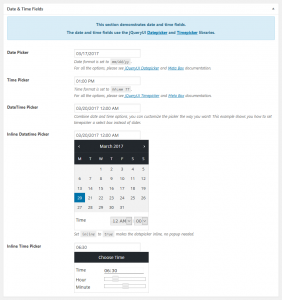
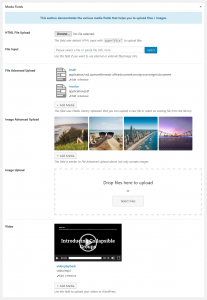
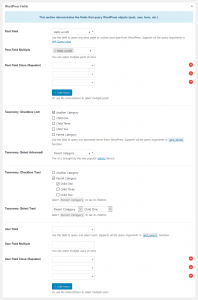
The best Meta Box plugins in WordPress

January 29, 2018

1, Option Tree

Option Tree – WordPress.Org

Option Tree – GitHub

OptionTree attempts to bridge the gap between WordPress developers, designers and end-users by creating fully responsive option panels and meta boxes with an ease unlike any other plugin. OptionTree has many advanced features with well placed hooks and filters to adjust every aspect of the user experience.

Build your Theme Options panel locally with an easy to use drag & drop interface and then export a functioning `theme-options.php` file for production use that is i18n translation ready, with your custom text domain automatically inserted.

And, in just a few simple lines of code, save settings to the database with a unique array ID so none of your Theme Options conflict with other themes that use OptionTree.

Also, OptionTree now takes full advantage of the new color schemes introduced in WordPress 3.8, it looks and feels built-in.

2, Meta Box By MetaBox.io

– Plugin URL: https://wordpress.org/plugins/meta-box/

A lightweight & feature-rich WordPress plugin that helps developers to save time building advanced custom fields and meta boxes in WordPress.

The plugin provides a wide range of field types and a lot of options to for each field type, which gives you unlimited possibility to control and customize the custom fields.


3, CMB2 by CMB2 team

– CMB2  URL: https://cmb2.io/

– CMB2 – WordPress.Org: https://wordpress.org/plugins/cmb2/

CMB2 is a developer’s toolkit for building metaboxes, custom fields, and forms for WordPress that will blow your mind. Easily manage meta for posts, terms, users, comments, or create custom option pages.

FEATURES:

  • Create metaboxes to be used on post edit screens.
  • Create forms to be used on an options pages.
  • Create forms to handle user meta and display them on user profile add/edit pages.
  • Create forms to handle term meta and display wherever your taxonomies are used.
  • Flexible API that allows you to use CMB forms almost anywhere, even on the front-end.
  • Several field types are included.
  • Custom API hook that allows you to create your own field types.
  • There are numerous hooks and filters, allowing you to modify many aspects of the library (without editing it directly).
  • Repeatable fields for most field types are supported, as well as repeatable field groups.
  • CMB2 is safe to bundle with any project. It will only load the newest version in the system.


WordPress Tutorials

PHP tricks

December 19, 2017

Using @ to disable errors

If you find an error message particularly annoying and you are sure it definitely does not apply to you, PHP has a method for you to silence the message entirely. If you place an at symbol, @, before a function that generates an error, PHP will catch the error and silence it entirely. Consider the following two complete scripts:

Script 1

<?php
cactus();
?>

Script 2

<?php
@cactus();
?>

In script one, the undefined function cactus() is called. When this script is run, PHP will halt execution at the undefined function, and print out a fatal error message. However, when the second script is run, PHP will attempt to call the cactus() function, fail, but will not halt execution or print out an error – all thanks to the @ symbol before the function call.

While there are legitimate uses for suppressing errors in this way, it is not advised, because it usually works in the same way that sweeping dust under a carpet does not make a house any cleaner – hiding a problem is not the same as solving it! If you explicitly wish to have errors suppressed with @, it is strongly advised that you always write your own code to check return values of functions.

Removing HTML from a string

string strip_tags ( string source [, string allowable_tags])

strip_tags() is a function that allows you to strip out all HTML and PHP tags from a given string (parameter one), however you can also use parameter two to specify a list of HTML tags you want.

This function can be very helpful if you ever display user input on your site. For example, if you create your own messageboard forum on your site a user could post a title along the lines of: <h1>HELLO WORLD!</h1>, which, because you would display the titles of each post on your board, would display their unwanted message in huge letters on your visitors’ screens.

Here are two examples of stripping out tags:

<?php

$input = “<i><h1>Hello World!</h1></i>”;
$a = strip_tags($input);
$b = strip_tags($input, “<h1><b>”);

?>

After running that script, $a will be set to “Hello World!”, whereas $b will be set to “<h1>Hello World!</h1>” because we had “<h1>” in the list of acceptable tags.

PHP Output Buffering

bool ob_start ( [callback output_function])
bool ob_end_flush ( void )
bool ob_end_clean ( void )

There are two ways to start buffering output: through a setting in php.ini to enable output buffering for all scripts, or by using a function call on a script-by-script basis. Surprisingly, the latter is preferred – it makes your code more portable, and also gives you greater flexibility.

To create a new output buffer and start writing to it, call ob_start(). There are two ways to end a buffer, which are ob_end_flush() and ob_end_clean() – the former ends the buffer and sends all data to output, and the latter ends the buffer without sending it to output. Every piece of text outputted while an output buffer is open is placed into that buffer as opposed to being sent to output. Consider the following script:

<?php
ob_start();
print “Hello First!\n”;
ob_end_flush();

ob_start();
print “Hello Second!\n”;
ob_end_clean();

ob_start();
print “Hello Third!\n”;
?>


That script will output “Hello First” because the first text is placed into a buffer then flushed with ob_end_flush().
The “Hello Second” will not be printed out, though, because it is placed into a buffer which is cleaned using ob_end_clean() and not sent to output.
Finally, the script will print out “Hello Third” because PHP automatically flushes open output buffers when it reaches the end of a script.

WordPress Tutorials

Fatal error: Call to undefined function get_parent_theme_file_path() & get_parent_theme_file_uri()

October 19, 2017

Hello,

In the progress of product development and customer support (over 18,000 customers around the world), we see that a large number of users and customers encounter the above error, so how to fix them in the simplest and quickest way, please see the instructions below. We believe it will help you in the best way to get rid of that problem.

After you update your themes or plugins, if you see the Fatal error: Call to undefined function get_parent_theme_file_path() & get_parent_theme_file_uri(), don’t worry. This problem occurs when your WordPress is in old version. Those functions are supported by WordPress since version 4.7. You only need to update WordPress to the latest version or minimum from 4.7 to fix the above error.

Now, you can try to update your website and we recommend that you always keep up with the latest versions of WordPress, Plugins & Themes. Make sure they are up to date to keep you get on new features, as well as fix bugs.

Thanks for reading this post. If you feel it interesting and useful, share it to help others get out of the problem quickly.

Have a nice day 🙂