Archives

WordPress Plugins, WordPress Tips

How to bulk delete thousands posts in WordPress

April 30, 2018

Have you been in a case which requires you to delete a ton of posts? If so, I won’t tell you about WordPress reset plugin because it will sweep out all of your site data, not only posts. There should be another way? Sure, let’s check it out my blog 😉

First, bulk deleting posts by default WordPress function

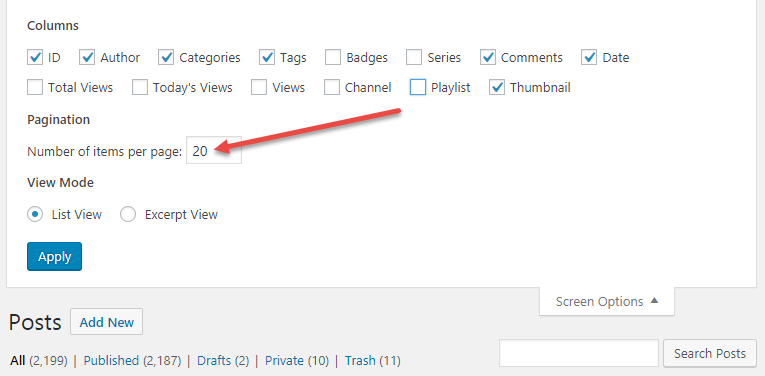
Currently, WordPress just display 20 posts per page in Dashboards > All Posts, which means you just can remove 20 posts at once. But you can increase this number easily by open Screen Options > Pagination: enter the Number of items per page as you need. Please note that the value must be less than or equal 999. However, I recommend you just enter the number less than or equal 99 to avoid an infinite page loading if your host is not powerful enough. And don’t forget to revert the posts pagination back to 20 when you’re done.

You can process the delete task more quickly, can’t you? Wait for a second, what’s about a thousand posts at one as I said before? Huh, you still need to do it better than that. Don’t be impatient. You will have the answer right now.

Second, using Bulk Delete plugin:

Actually, the plugin not only allows you to delete posts but also pages, attachments, users and meta fields in bulk based on different conditions and filters. In this example, I will focus on how to delete posts. Now, you can download the plugin at https://wordpress.org/plugins/bulk-delete/

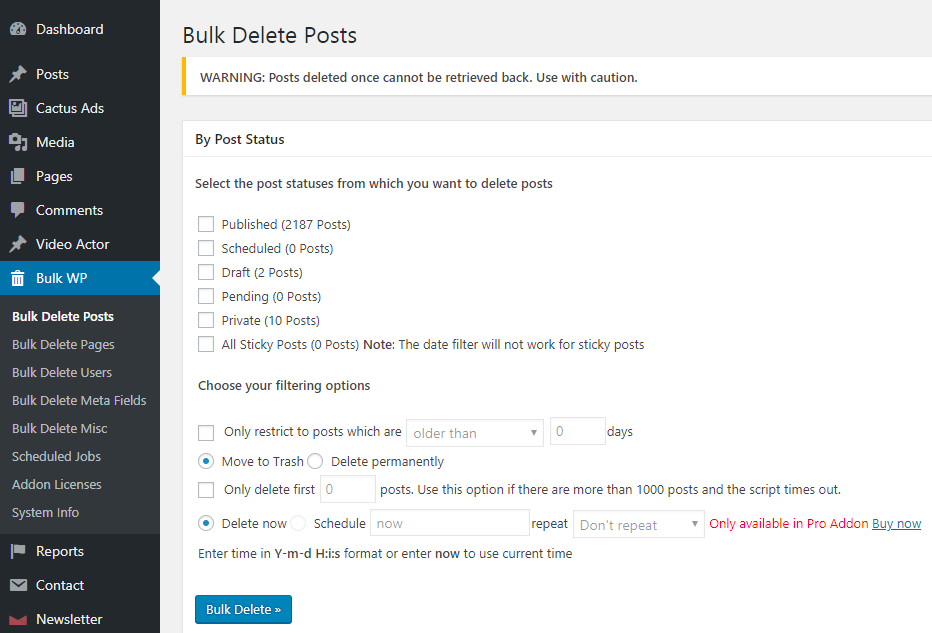
Once the plugin is installed and activated, a Bulk WP menu appears on the WordPress Dashboard. In Bulk Delete Posts, there are many conditions for you to chose how do you want to remove your posts:

  • Delete posts by category
  • Delete posts by tag
  • Delete posts by custom taxonomy
  • Delete posts by custom post type
  • Delete posts by url
  • Delete all draft posts
  • Delete all pending posts
  • Delete all private posts
  • Delete all scheduled posts

The plugin performance is excellent comparate to the traditional delete method of WordPress. I deleted more than 2 thousand posts within minutes. Ahh, don’t forget this warning: “Posts deleted once cannot be retrieved back. Use with caution.”

If you still need more than that. Please take a look at these features of Pro Add-on such as:

  • Delete posts by custom field
  • Delete posts by title
  • Delete posts by duplicate title
  • Delete all scheduled posts
  • Delete all posts from trash

Although the Plugin provides comprehensive options and filters to perform the bulk deletion. You even have one more choice to remove posts by using PHP MyAdmin and it’s indeed a high-speed process. However, since deleting posts in the database needs technical skills, it’s just recommended for advanced users & developers.


WordPress Plugins

Add Tooltip Glossary to your WordPress

January 31, 2018

Are you a Word Press user which own an educational site or a personal blog with niche topics? You are tired of having to explain the technical terms to the reader over and over. If so, congratulation! You’ve come to the right place. In this blog post, I’m going to show you how to create a glossary using the free CMP glossary tooltip plugin. Yes, it’s a kind of “Write less, do more” 😉

First, get the plugin at https://wordpress.org/plugins/enhanced-tooltipglossary/.

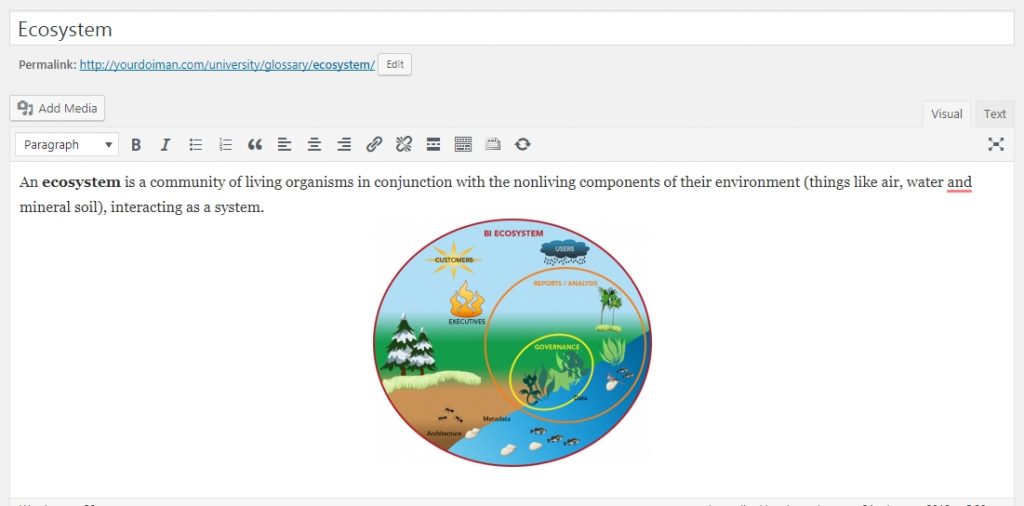
Once the plugin is installed and activated, you can easily start defending your terms by going to CMP Glossary Tooltip > Add New. The title of the page should be the term, the body content should be the definition. You are free to add content to


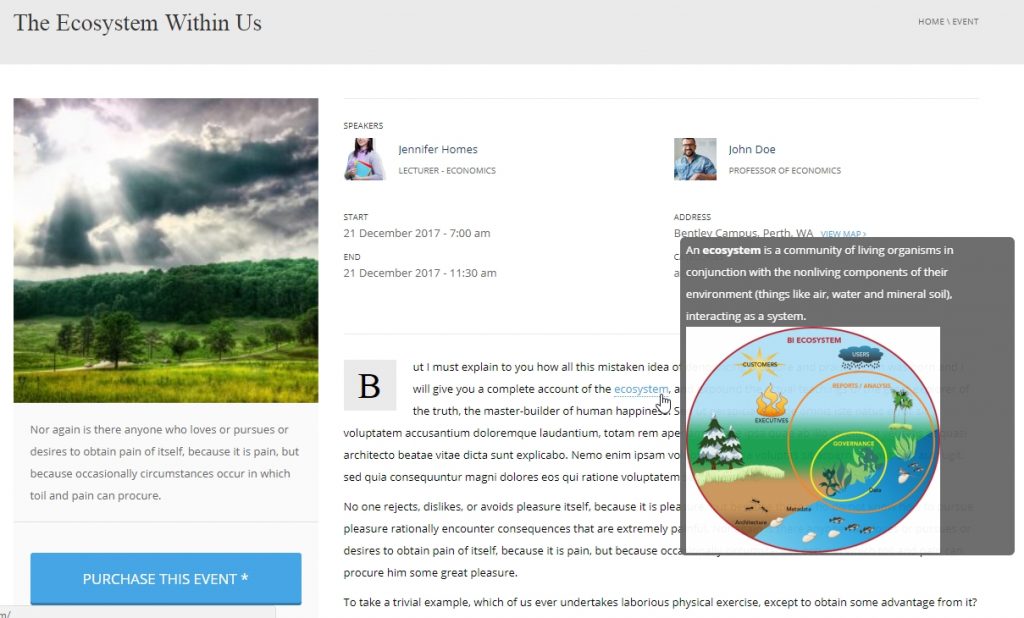
The plugin will scan your posts or pages for defined glossary terms, by adding links to a glossary term page that contains the definition of the term used. When users hover over a specific term, it displays a tooltip containing the definition of this term. You can take a look at this example to see how it work in our University theme:


Although this tooltip limits 500 terms for the free version, it allows you to add unlimited tooltips to a site or within a glossary of terms. Another plus point is that it also creates a responsive glossary index with all tooltip glossary terms used for your site, hence readers can quickly find the term they want.


In my opinion, many webmasters can build a small encyclopedia or dictionary for their website within this plugin. Many others possibly want to have more advanced functions such as related terms, abbreviations, variations, synonyms etc. The hint is the Pro version of CM Tooltip Glossary.

That’s why we love Word Press, isn’t it? You have a great free version to use as long as you want. And there’s always a premium version to explore more features 🙂

CactusThemes Users, WordPress Plugins

BULK IMPORT VIDEOS PLUGINS FOR WORDPRESS

December 29, 2017

As team author of CactusThemes – provider of 3 well-known Video Themes: VideoPro, TrueMag, and NewsTube, we received numerous questions about what’s plugin to bulk import videos to the themes and its features. Today, we summarize both Pros & Cons of 3 popular plugins with some reviews especially regard to videos import. Hopefully, it will help you make a good choice. Here we go!

1. WordPress Automatic plugin – 25$

This powerful plugin offers you the widest range of content sources to import data: Youtube, Vimeo, Dailymotion, Facebook, Twitter, etc. In my opinion, the key feature of the plugin is it imports content by campaigns. Let’s imagine, you have a plan to import YouTube videos, another for Facebook posts, and they both work automatically to fetch content into your site. That’s why the author calls it auto-pilot plugin

Download link            Document                  Video tutorial

PROs

  • Support to import data from 19 content-sharing networks
  • Quick & easily manage your import plans via campaigns
  • A lot of options to import video: by Channel, Playlist, single or multiple videos import by IDs.
  • Can fetch many YouTube statistics: Views, Likes, Dislikes, Comments counts
  • Import YouTube tags, comments without add-on – really a plus point

 CONs

  • Old-fashion plugin interface possibly makes you feel bored while using
  • Its document is just the explanation of the plugin options. There was lack of examples and demos.
  • Some advanced options such as Add custom fields to the post requires technical knowledge to handle

REVIEW

An effective plugin at a reasonable price for all but it’s strongly recommended for experienced WordPress users.

2.     WordPress Video Robot plugin – 36$

Download link            Document                  Video tutorial

PROs

  • Rich sources of reference materials including document and video tutorials for beginners
  • The plugin author even build demo for VideoPro, TrueMag, NewsTube themes with tutorials
  • Modern & catchy plugin interface which options explanations & illustrations
  • Once installed, the plugin auto fills the Youtube, Vimeo & Dailymotion API keys for users.
  • Responsive support team for plugin fixes bugs and usage

CONs

  • You have to install theme-fix add-on to make the plugin work with your theme.
  • Plugin options and settings are scattered in various sections may confuse users at the beginning
  • Work really slow compare to the other plugins.
  • Technically, if you import video follow the default WordPress video post format, the plugin adds many custom fields to the post data which reduce processing speed.
  • In case, you import video using the custom WPVR post type, it may cause some compatibility issues with the theme.
  • You have to buy premium add-ons for more functionalities. For example, it costs 19,9$ to get Comment Importer add-on while WordPress automatic plugin supplies a built-in option to import comments from YouTube, Facebook, etc.
  • Currently, the plugin doesn’t support to fetch data of likes, dislikes, comments count from YouTube but the author planned to make it work in the next release. (So I will delete this point afterward :D)

REVIEW

It’s now a recent trending plugin with friendly interface. Although we don’t appreciate the of the plugin stability at this time, the plugin developers actively update to improve plugin functions.

3.     YouTube WordPress plugin – 36$

Download link            Document                  Video tutorial

PROs

  • Fast and straight-forward to operate
  • Support to import videos by ID, Channel, user uploads or playlists.
  • Synchronize your YouTube channels with your WordPress site.
  • You can select any number of videos from YouTube when doing bulk import
  • Can be customized to fill any custom fields needed to display your videos

CONs

  • Support only one video source: YouTube
  • It seems to be a quite pricey plugin for import content

REVIEW

Set at a dear price, however, this plugin only helps you to import video from Youtube network. Probably, the advantages of the plugin are its speed & convenience and the ability to synchronizing videos from your YouTube channel.

The bottom line

Within this blog post, maybe, we didn’t completely cover all the advantages and limitations of these plugins. By our hands-on experience, we use WP Automatic for two main reasons: speed and performance. How about you? Have you found the one that suits you best? Please feel free to share your thought and ideas.

WordPress Tips

Debug on a live WordPress site

October 31, 2017

Debug is an indispensable part of Website Development as it helps developers detect bugs in most cases. If you are working on local and a test site, it doesn’t need to think twice to turn on the WordPress Debug Mode to check bugs.

However, when your website has launched already, displaying the error messages will annoy any visitors. It’s time to go with Debug Log and Debug Display. So, what’re they?

  • WP_DEBUG_DISPLAY will manage the display of error messages on all of your pages
  • WP_DEBUG_LOG can record all error messages to a debug.log file

That’s why we should use these statements in a conjunction to turn on debug without showing error messages on the site. Here we go.

Step 1:

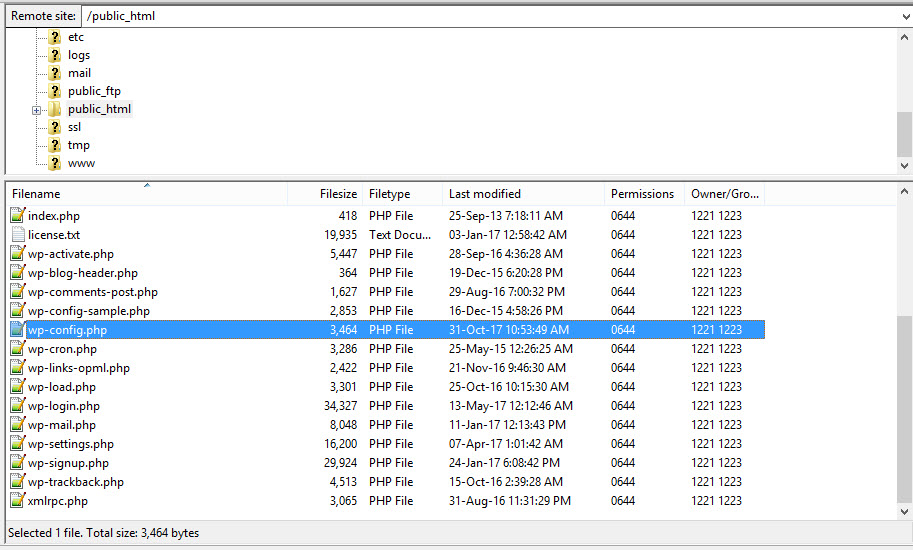
Connect to your FTP or login to cPanel > File Manager and browse to your-wordpress-folder/wp-config.php file

Step 2:

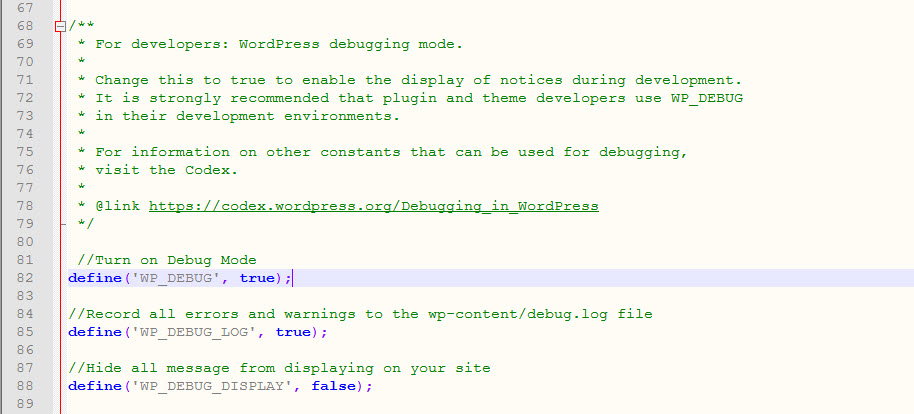
Find this line of code “define(‘WP_DEBUG’, false);

Step 3:

Turn on the Debug Mode by changing the status from “false” to “true” and add these two statements:

define(‘WP_DEBUG_LOG’, true);
define(‘WP_DEBUG_DISPLAY’, false);

It will look something like this:

Step 4:

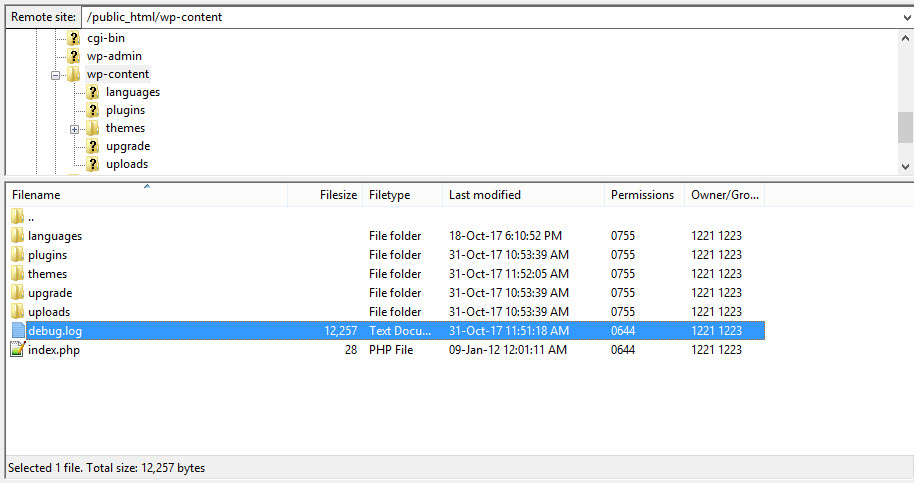
Don’t forget to save the changes, then go to the “wp-content/debug.log” file to discover the result.

It’s easy, right? Hopefully, this quick guide is helpful for not just developers but also ordinary users. Please feel free leave a comment if you have any feedback. And don’t forget to check out other blog posts for more interesting stuffs 😉