Browsing Category

WordPress Tutorials

Featured, WordPress Themes, WordPress Tutorials

Masonry layout in designing educational WordPress theme

September 14, 2015

With the current trend, more and more WordPress websites use Masonry layout, which is favored by a lot of users. The name of this layout probably originates from the jQuery Masonry plugin which is developed by David DeSandro – a designer of Twitter.

Masonry Layout is initially used by Pinterest.com, a famous website that specializes in sharing images and other media content; so Masonry Layout is also known for the name of Pinterest Style Layout.

While Masonry layout is usually used on photography or creative websites, it is a good idea to build education WordPress sites owning this grid style. If you are a WordPress designer or developer, you should think about creating an educational WordPress theme with Masonry design. You can read the following section in order to know how to create this trending layout.

As we often see, elements in the classic layouts are often aligned with CSS floats. It means that to arrange these elements horizontally and vertically, their size will be ignored. This creates a lot of unnecessary gaps in the layout of many WordPress themes like WordPress education academy theme.

  educational wordpress theme 1

However, with the Masonry layout, elements will be arranged based on columns with no fixed height rows. In particular, it reduces the spaces and tries to fit the maximum number of elements into the rows and columns. Simply, you imagine a Masonry layout looks like the puzzle game Tetris.

  educational wordpress theme 2

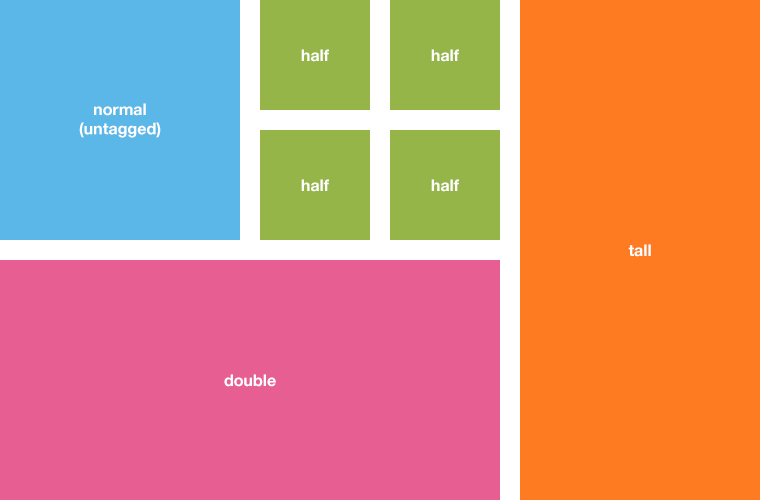
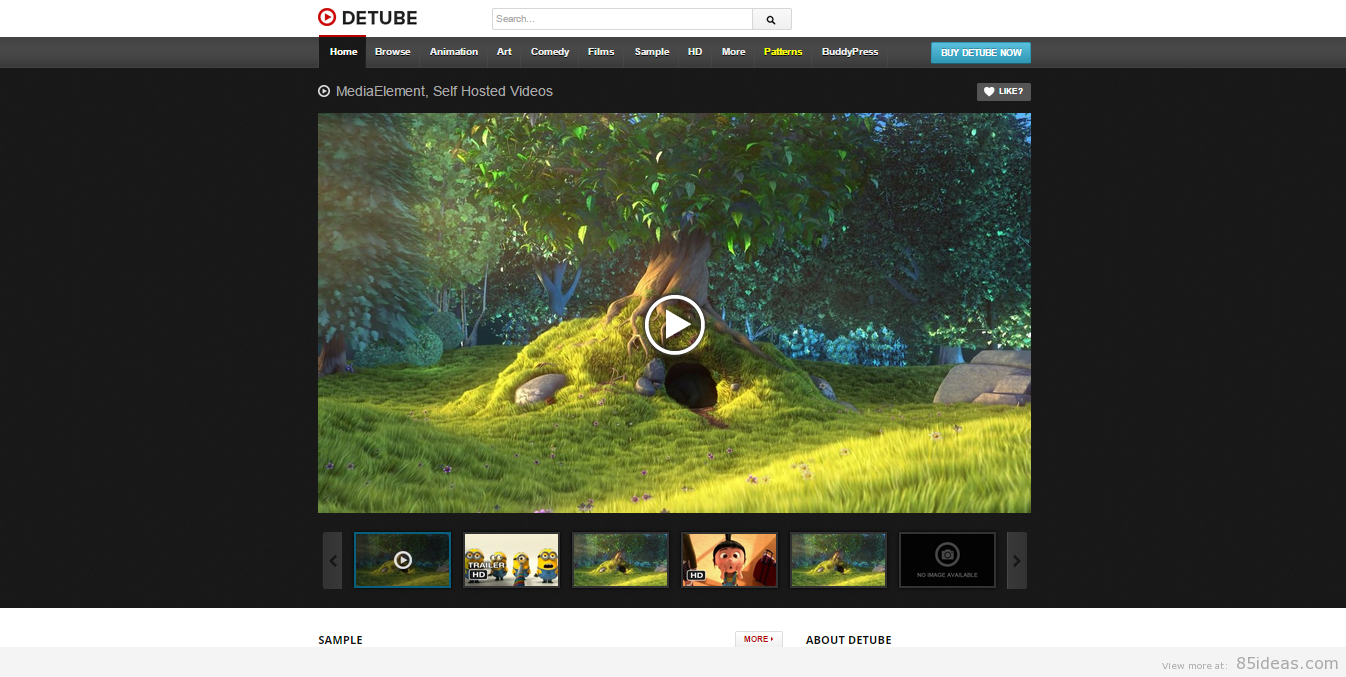
Masonry layout in use

Masonry Layout can be well applied for a WordPress education academy theme to present classes’ images (Image Gallery) or online/onsite courses. This kind of layout is suitable with the websites using infinite scrolling. It is very wonderful.

How to create Masonry layouts

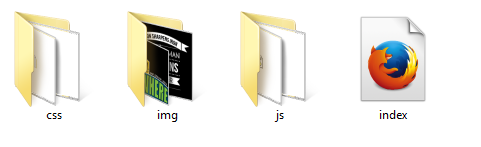
In order to create a Masonry layout is quite simple, you need to download and activate the jQuery Masonry plugin. Make sure that your parent folder has the following file and folders: css, js, img and index.html

educational wordpress theme 3

This is the HTML code for a simple Masonry layout:

<!DOCTYPE html>

<html>

<head>

        <title>Masonry Layout</title>

        <meta charset=”utf-8″ />

        <meta http-equiv=”X-UA-Compatible” content=”IE=edge, chrome=1″ />

        <meta name=”viewport” content=”width=device-width, intial-scale=1.0, user-scalable=no” />

        <link rel=”stylesheet” href=”css/normalize.css” />

        <link rel=”stylesheet” href=”css/main.css” />

</head>

<body>

        …

        …

        …

        <!—end header –>

        <section class=”container”>

                <ul>

                        <li class=”item red”>

                                <a href=”https://www.behance.net/gallery/Oscar-Wilde/9330545“>

                                        <img src=”img/1.jpg” alt=”1″ />

                                        <p>Dewald Venter</p>

                                </a>

                        </li>

                        …

                        …

                        …

                </ul>

        </section>        <!– end container –>

        <!– Javascript – Jquery –>

        <script src=”js/jquery.min.js”></script>

        <script src=”js/masonry.min.js”></script>

</body>

</html>

Next, use CSS code to style the layout:

*, *::after, *::before {

        -webkit-box-sizing: border-box;

        -moz-box-sizing: border-box;

        box-sizing: border-box;

}

a {

        display: block;

        text-decoration: none;

        color: #000;

}

ul {

        list-style: none;

}

img {

        display: block;

        max-width: 100%;        /* flexible image */

        outline: none;

        border: none;

        margin: 0 auto;         /* align center image */

}

.container {

        max-width: 1200px;

        margin: 100px auto;

        padding: 0 auto;

}

.container ul .item {

        text-align: center;

        border-radius: 10px;

        display: block;

        width: 32%;     

        padding: 8px;

        margin: 7px 5px;

}

/* Responsive design */

@media screen and (max-width: 900px) {

        .container ul .item {

                width: 45%;

        }

}

@media screen and (max-width: 500px) {

        .container ul .item {

                width: 100%;

        }

}

Finally, use the below jQuery script so as to initialize the Masonry layout. Note that item selector must be elements in the container:

<script>

        $(document).ready(function() {

                var $container = $(‘.container’);

                $container.masonry({

                                itemSelector: ‘.item’

                });

        })

</script>

Conclusion

In general, it is easy to generate a masonry layout for using plugins. You can choose to use another plugin instead of jQuery Masonry plugin and create a Masonry educational WordPress theme as your liking.

Featured, WordPress Themes, WordPress Tutorials

How to select a best WordPress theme for video

August 22, 2015

Selecting a best WordPress theme for video blog is one of the good ways to determine the future of your video-related site. A good theme not only makes a good impression to visitors but also helps your SEO. The structure of your design plays an important role in searching engine optimization. This article will share some useful experience on choosing a theme that is suitable for your videos.

Select a Theme that Matches Your Content

This is obviously the most important one. If you want to pick a best WordPress theme for video blog, then choose one that relates to your content. In particular, if intending to build a simple video, you should choose a generic theme with some video features. However, in order to create an extensive video portfolio you will need a theme that supports more video features. For many bloggers, it’s very simple as they choose a very generic theme and install some free plugins supporting videos. This isn’t a bad option for a starter with low budget.

Pick a Simple and Easy-to-use video WordPress Theme

There are a lot of WordPress themes for video site in the market that has lots of features. It may look beautiful in the display but not be easy for you to customize and manage. One suggestion that you shouldn’t get into a fancy work, instead, you can choose themes with simple design because they are easy to modify.

If you want a theme that has many advanced features, you should get a custom one since this is the only way you can assure functionality.

video themes WordPress 2015 9

An advance solution for video WordPress theme

Check for Browser Compatibility

It is important to make sure that your new WordPresss video theme is compatible with mobile devices and all main browsers, including old browsers like IE8. If you ignore this, it might lead to poor user experience for those who access your site via mobile or a browser which is not supported by the theme.

best WordPress theme for video

Be Aware of the Terms of Service

When looking for a free or premium WordPress theme for video blog, you should be aware of its terms of service. If a free theme requires a lot of backlinks, you move it on.

Remember to follow the term of service to ensure that you are using the video theme in a right way. Also, this shows that you appreciate the works of authors and encourage them to creating more good themes.

Recommendation

You can download a lot of free theme on the Internet. However, we suggest that you look for something that you will get frequent support for. Premium video themes take a one time fee but provide guaranteed support. The following are premium themes you should consider:

  • VideoTouch – Video WordPress Theme
  • deTube – Professional Video WordPress Theme
  • VideoTube – A Responsive Video WordPress Theme
  • True Mag – WordPress Theme for Video and Magazine
  • SOHO – Fullscreen Photo & Video WordPress Theme
  • Snaptube – Premium Video WordPress Theme
WordPress Tutorials

6 ways to insert charts into WordPress education themes

August 19, 2015

Beside the images, bloggers often want to present the statistics under the charts and graphs to help readers access easier. According to the default settings of WordPress in general and WordPress education themes particularly, it is impossible to create charts or graphs but there are some codes, plugin or API library to enable the users to insert the interactive charts and graphs. Some people like to use the simple method such as setting up and using plugin while some prefer using codes or API. Therefore, depending on design requirements, you can choose the suitable one.

wordpress education themes 1

The list below provides you six methods to insert charts and graphs into WordPress in general and WordPress themes on education in particular.

ChartBoot for WordPress

This is a useful plugin for inserting the available graphs of Google into the WordPress generally and WordPress themes on education in particular. Thanks to it, you can directly create or edit the graphs of Google from the inside of dashboard. You can input the data for the graphs from Excel and then insert into the WordPress education themes after completing the settings. You can also choose the position for the graph by copying and pasting its shortcode to the appropriate chart.

Easy Graphs

This plugin is quite flexible in creating bar, line and pie; meaning that its shortcode can accept detailed specifications for data and other information in order to create a complete one. If you want to compare two values of the data on the same pie chart, this plugin will be a great choice.

JSXGraph – Graphics with JavaScript

If you want to insert the geometric charts into the WordPress or WordPress education themes, you should choose this plugin. All charts in the plugin can automatically update the data. It is extremely useful for education websites as it help students insert the charts into the post more conveniently.

Google Docs Spreadsheet Charts

chart - wordpress education themes

You can also use Google spreadsheet to create charts for WordPress themes on education. To take the data, you need to press Publish chart after input. The chart is directly linked with Google Docs Spreadsheet Charts and automatically updated when the data is modified. This method is effective, reliable and highly recommended when doing surveys with the ever-changing data.

Easy Chart Builder

This plugin provides you an easy and direct way to create charts. You can edit the size for the chart to make it fit with mobile themes (Interactive with Responsive Theme). You can also insert charts into widget areas and custom pages.

Google Visualization Charts

It is an ideal plugin for different charts. You can directly enter the information of the chart into a shortcode and set it up in the suitable position in the WordPress site. After activated, Google Visualization Charts will automatically fetch the API code of Google to create charts. Moreover, the plugin supports a size adjustment feature which helps your charts look great on mobile phones and tablets.

WordPress Tutorials

Beginners’ guide: How to insert media files into a WordPress education theme

August 17, 2015

 Media Library

You can easily manage all the images and media files uploaded by accessing to “Media -> Library” in Dashboard.

In this part, you can view the whole files you uploaded and choose the type of displaying (mesh or common type). You can also see the date and month as well as click the connection “Add New” to upload the files without opening the text editor.

wordpress education theme 1

Insert photos and media files

In the post or page editor screen, you can easily see the button “Add Media” right above the editor area. Thanks to this, we can insert all kinds of media files from images, sounds to videos and so on into the content of themes, particularly, WordPress education themes. By default, WordPress supports you to upload files directly from your computer to the website and save them on the host. Moreover, you can insert images from any links.

wordpress education theme

Below is the theme displaying after pressing the button “Add Media”

wordpress education theme 3

In this way, it is suggested that you should upload the files right to the host (except from the extremely large files with the size of more than 10 MB) so that you can easily manage and reuse them.

You should try to upload a media file by pressing the button “Select Files” or drag and drop the photo to the space on the window. Additionally, you can upload many files at the same time.

After uploading, the media file ready for inserting will look like below:

wordpress education theme

By pressing “Insert into the post”, the image or media file is inserted into the content to display in the WordPress online education theme.

After that, you can click on the inserted file and use the available options to customize it.

wordpress online education theme

If you want to add the description for the file, write it in the Caption field while editing or inserting the file.

Edit media files

WordPress themes, especially the WordPress online education theme has a useful set of editing tools for images and media files on the website. You can cut, rotate or adjust the size of the files. All changes will be done directly on the WordPress education theme without other tools. To use this function, you have to go into “Media -> Library -> Choose the image for editing -> Edit image”.

wordpress education theme 6

After that, you can open it in the editor and edit as your preference. Next, you will press the button “Save” to complete image edition.

wordpress education theme 7

In conclusion, after reading this article, you will know how to insert any media files or images into the content of WordPress. Hopefully, you can use all the functions of WordPress education theme quicker and easier.